Super Dev Mode with GWT 2.5.1-rc1 and Chrome 26.0

April 13th, 2013 No comments

Here are the steps to run the super dev mode which is a new feature of GWT 2.5.
The versions i used are GWT 2.5.1-rc1 and Chrome 26.0. That version of Chrome requires the latest version of GWT, otherwise it will not work. I tested it with GWT 2.5 previously and I could not see the source code in Chrome browser.

  • Step 1 :

Modify the module.gwt.xml file to add these lines :


<add-linker name="xsiframe"/>
<set-configuration-property name="devModeRedirectEnabled" value="true"/>

  • Step 2 :

Compile your code as you usually do : mvn install

  • Step 3 :

Launch the super dev mode. That can easily be done with the gwt-maven-plugin plugin and the goal run-codeserver :

SuperDevMode

The following lines appear at the end of the console in Eclipse :

[INFO] The code server is ready.
[INFO] Next, visit: http://localhost:9876/
  • Step 4 :

Open the URL http://localhost:9876/ in Chrome :

GWTCodeServerChrome

And do as it says : create 2 bookmarks in Chrome for Dev Mode On and Dev Mode Off, with the help of the bookmarklets. Which I have already done.
Then run the application.
Since I did not use an external server, I ran the application in development mode (gwt:run) so it runs with Jetty. But i could have run it directly under WebLogic for instance.
Then go to the URL of the application :
http://127.0.0.1:8888/PlanetEarth.html?gwt.codesvr=127.0.0.1:9997
In fact remove the “?gwt.codesvr=127.0.0.1:9997″ part of the URL. It is no longer necessary to install the Google Web Toolkit Developer Plugin for the browser. So the URL to go to is http://127.0.0.1:8888/PlanetEarth.html :

SuperDevModeChrome1

  • Step 5 :

While on that page, click on the “Dev Mode On” bookmark. A popup asking to compile the module will show up :

SuperDevModeChrome2

Click on Compile. This will recompile the application.
Then in Chrome go to Tools > Developers Tools > Settings and check the checkbox “Enable source maps” :

SuperDevModeChrome3

Refresh the page and you should see the Java code in the “Sources” tab :

SuperDevModeChrome4

You can then directly debug in Chrome by adding breakpoints :

SuperDevModeChrome5

Link :
https://developers.google.com/web-toolkit/articles/superdevmode

Categories: GWT Tags:

About some of the new features of Java 8 …

March 30th, 2013 No comments

Just want to signal something that a lot of Java developers seem not to be aware of :
a few of the upcoming features of the JDK 8 have been available in C# for some time now.

.NET / C# Java
Lambda expressions (closures) .NET 3.5 - C# 3 - 2007 JDK 8 - 2013
Virtual extension methods .NET 3.5 - C# 3 - 2007 JDK 8 - 2013
... ... ...

C# was inspired by Java and C++ and now it kind of feels like Java 8 is catching up with C# !
But it is a good thing when the languages influence each other.
That is the case with C# and Java but that is also the case with Windows Forms / WPF + XAML and JavaFX 2 / GWT or ASP.NET MVC and Java MVC-based frameworks, etc.

That is another good reason to be open to both worlds.

Categories: .Net, ASP.NET, C#, Java Tags:

[JPA 2] Adding support to WebLogic 10.3.5 for JPA 2

March 1st, 2013 No comments

WebLogic 10.3.5 is JAVA EE 5 certified. However JPA 2 is not part of the JAVA EE 5 (2006) specifications, it is part of the JAVA EE 6 (2009) specifications.
So since WebLogic Server implements the Java EE 5 specification, it is not required to support JPA 2. However it is possible to add support to WebLogic 10.3.5 for JPA 2. Look no further, the answer is of course on Oracle WebLogic website: Using Oracle TopLink with Oracle WebLogic Server

A default WebLogic installation already contains the files needed :

javax.persistence_1.0.0.0_2-0-0.jar
com.oracle.jpa2support_1.0.0.0_2-0.jar

So if you make the choice to configure things manually then you do not need to install a patch.
It is just a matter of declaring a PRE_CLASSPATH environment variable in the file commEnv.cmd (Windows) or commEnv.sh (Linux) located in the WL_HOME/common/bin/ folder.

Under Windows :

@rem JPA 2 activation

set PRE_CLASSPATH=%BEA_HOME%\modules\javax.persistence_1.0.0.0_2-0-0.jar;%BEA_HOME%\modules\com.oracle.jpa2support_1.0.0.0_2-0.jar

Under Linux :

PRE_CLASSPATH=${BEA_HOME}/modules/javax.persistence_1.0.0.0_2-0-0.jar:${BEA_HOME}/modules/com.oracle.jpa2support_1.0.0.0_2-0.jar
export PRE_CLASSPATH

If you do not configure WebLogic 10.3.5 to support JPA 2 you will get an error message like this one :

nested exception is:
	javax.ejb.EJBException: what do i do: seems an odd quirk of the EJB spec.
  The exception is:java.lang.NoSuchMethodError: javax.persistence.EntityManager.createQuery(Ljava/lang/String;Ljava/lang/Class;)Ljavax/persistence/TypedQuery;;
nested exception is: javax.ejb.EJBException: what do i do: seems an odd quirk of the EJB spec.
The exception is:java.lang.NoSuchMethodError: javax.persistence.EntityManager.createQuery(Ljava/lang/String;Ljava/lang/Class;)Ljavax/persistence/TypedQuery;

javax.ejb.EJBException: what do i do: seems an odd quirk of the EJB spec.
 The exception is:java.lang.NoSuchMethodError: javax.persistence.EntityManager.createQuery(Ljava/lang/String;Ljava/lang/Class;)Ljavax/persistence/TypedQuery;

There is no need to edit the file weblogic-application.xml and to add some additional prefered application package. That one for instance works :

<?xml version="1.0" encoding="UTF-8" ?>
<weblogic-application xmlns:xsi="http://www.w3.org/2001/XMLSchema-instance"
	xmlns:wls="http://www.bea.com/ns/weblogic/90"
	xsi:schemaLocation="http://java.sun.com/xml/ns/j2ee http://java.sun.com/xml/ns/j2ee/j2ee_1_4.xsd http://www.bea.com/ns/weblogic/90 http://www.bea.com/ns/weblogic/90/weblogic-application.xsd">
	<prefer-application-packages>
		<package-name>org.apache.commons.lang.*</package-name>
		<package-name>org.eclipse.persistence.*</package-name>
	</prefer-application-packages>
	<application-param>
		<param-name>webapp.encoding.default</param-name>
		<param-value>UTF-8</param-value>
	</application-param>
	<session-descriptor>
		<persistent-store-type>replicated_if_clustered</persistent-store-type>
	</session-descriptor>
</weblogic-application>


Categories: Criteria, JPA, JPQL, WebLogic Tags:

[GWT] How to print a widget or a page

January 30th, 2013 No comments

To print a widget or an entire page with GWT, you can use JSNI and the JavaScript print function.

A good practice is to put all the content you want to print inside a DIV tag, for instance :

<!DOCTYPE ui:UiBinder SYSTEM "http://dl.google.com/gwt/DTD/xhtml.ent">
<ui:UiBinder xmlns:ui="urn:ui:com.google.gwt.uibinder" xmlns:g="urn:import:com.google.gwt.user.client.ui" xmlns:p1="urn:import:com.mycompany.gwtproject.client.common.ui.composite">
	<ui:style>
		/* Add CSS here. See the GWT docs on UI Binder for more details */
		.important {
			font-weight: bold;
		}
	</ui:style>
...
<div id="printAll">
	<g:Label text="Some title" styleName="pageTitle" />		
	<div style="height:30px"></div>
		<p1:DetailAgency ui:field="detailAgency " />
	<div style="height:30px"></div>
		<p1:DetailCountry ui:field="detailCountry" />
	<div style="height:15px"></div>
</div>
<div style="float:left;margin-right:20px">
		<g:Button text="Print" ui:field="printBtn" />
</div>

An id is assigned to that DIV tag (line 10) and a button is added to the page. It calls the Java print method from the Print class:


import com.mycompany.gwtproject.client.service.print.Print;

import com.google.gwt.core.client.GWT;
import com.google.gwt.event.dom.client.ClickEvent;
import com.google.gwt.uibinder.client.UiBinder;
import com.google.gwt.uibinder.client.UiField;
import com.google.gwt.uibinder.client.UiHandler;
import com.google.gwt.user.client.DOM;
import com.google.gwt.user.client.Element;
import com.google.gwt.user.client.ui.Button;
import com.google.gwt.user.client.ui.Composite;
import com.google.gwt.user.client.ui.Widget;
...

public class MyViewImpl extends Composite implements MyView {
...
@UiField
Button printBtn;

@UiHandler("printBtn")
void onPrintBtnClick(ClickEvent event) {
	Element element = DOM.getElementById("printAll");
	Print.it(element);
}

This class Print.java contains several methods it that help you print the window, a widget, etc. In the end, they call the JavaScript print() function :

...
public static native void printFrame() /*-{
        var frame = $doc.getElementById('__printingFrame');
        frame = frame.contentWindow;
        frame.focus();
        frame.print();
    }-*/;
...

You can apply CSS to the printed page. If you work with uiBinder and want to print a widget that has no id defined in the XML template, you can assign one in the corresponding Java class :

...
<g:VerticalPanel ui:field="myDetails">
	<p1:DetailAgency ui:field="detailAgency " />
	<p1:DetailCountry ui:field="detailCountry " />
</g:VerticalPanel>
...

import com.mycompany.gwtproject.client.service.print.Print;

import com.google.gwt.core.client.GWT;
import com.google.gwt.event.dom.client.ClickEvent;
import com.google.gwt.uibinder.client.UiBinder;
import com.google.gwt.uibinder.client.UiField;
import com.google.gwt.uibinder.client.UiHandler;
import com.google.gwt.user.client.DOM;
import com.google.gwt.user.client.Element;
import com.google.gwt.user.client.ui.Button;
import com.google.gwt.user.client.ui.Composite;
import com.google.gwt.user.client.ui.Widget;
...

public class MyView2Impl extends Composite implements MyView2 {

@UiField
VerticalPanel myDetails;

@UiHandler("printBtn")
void onPrintBtnClick(ClickEvent event) {
	printBtn.getElement().setId("details");
	Element element = DOM.getElementById("details");
	Print.it(element);
}

This will fire the print window :
Print

Links :
http://code.google.com/p/gwt-print-it/source/browse/trunk/src/br/com/freller/tool/client/Print.java

Categories: GWT, Java Tags:

[Book review] Programmation GWT 2, second edition

January 6th, 2013 No comments

Here is my book review of the second edition of the book Programmation GWT 2 (author : Sami Jaber). In French since the book is written in French.

Cette deuxième édition fait 21 chapitres (516 pages) alors que la première édition comptait 17 chapitres (461 pages). Soit environ 50 pages supplémentaires.
Elle prend en compte les nouveautés introduites depuis la version 2.0 jusqu’à la version 2.5.
Les développeurs francophones peuvent certainement remercier l’auteur d’avoir mis à leur disposition un livre en français qui est aussi complet et à jour sur GWT.

Chapitre 1
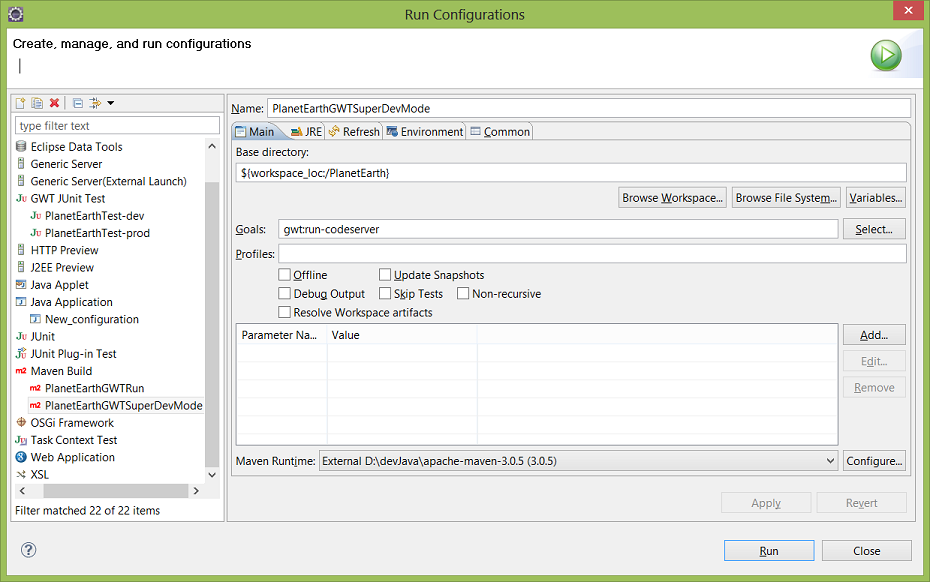
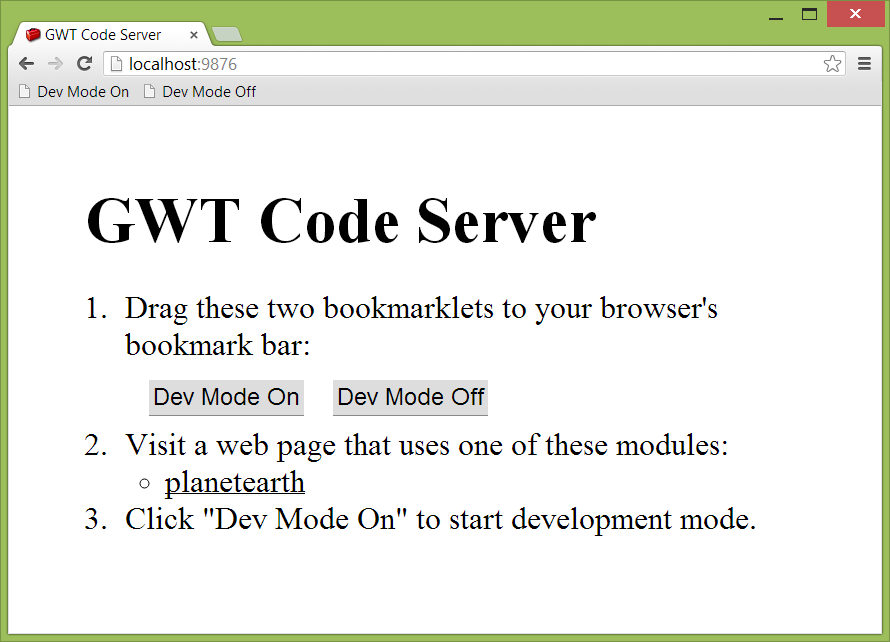
Le premier chapitre présente clairement la structure d’un projet GWT mais aussi les différents modes : mode développement et mode production. Avec une petite introduction à une nouveauté de la version 2.5 : le super DevMode.

Chapitres 2 et 3
Dans le chapitre 2, j’ai apprécié l’honnêteté de l’auteur qui souligne dès le début “la simplicité et la sobriété” des widgets disponibles en standard dans le framework. Les principaux widgets sont passés en revue, avec exemples d’utilisation à l’appui (code Java et CSS, ainsi que des captures d’écran).

Chapitre 4
Je pense que ce chapitre dresse un bon tour d’horizon des bibliothèques tierces (Sencha Ext-GWT, SmartGWT, GWT-DnD, GChart, GWT HighCharts) et des frameworks complémentaires (Vaadin entre autres).

Chapitre 5
L’utilisation de JavaScript dans du code Java est étudiée de façon minutieuse dans ce chapitre : insertion de code JavaScript dans une méthode Java, intégration d’un fichier JavaScript externe, correspondance des types entre Java et JavaScript, etc. L’auteur fournit également des explications sur les types Overlay, plutôt méconnus.

Chapitre 6
La création de composants personnalisés est souvent nécessaire dans un projet et ce livre ne manque pas d’y consacrer un chapitre entier. On y voit de façon détaillée la mécanique événementielle de GWT et le modèle de widget.

Chapitre 7
Ce chapitre décrit les services RPC et dévoile les bonnes pratiques à mettre en place lors de leurs utilisations.

Chapitre 8
Ce chapitre met l’accent sur l’intégration J2EE avec un exemple d’utilisation des EBJ 3 et de JPA. J’ai trouvé l’exemple pertinent et suffisamment illustré par du code.

Chapitres 9, 10 et 11
Ces chapitres expliquent et décrivent amplement le chargement à la demande (code splitting), la liaison différée (deferred binding) et la gestion des ressources (API ClientBundle) à grand renfort de code, de rapports de compilation, de captures d’écran de navigateurs, etc.

Chapitre 12
Ce chapitre rentre dans les entrailles de GWT : différentes facettes du compilateur, fichiers créés, réduction de code (pruning) et optimisations.

Chapitre 13
Le mécanisme de l’internationalisation avec GWT est traité dans ce chapitre. L’auteur aborde et montre bien l’utilisation de l’API i18n, les dictionnaires, les messages, les conversions de types ainsi que l’outillage.

Chapitre 14
Les tests ne sont pas délaissés puisqu’un chapitre entier y est dédié. On y voit l’utilisation de GWTTestCase, HTMLUnit et Selenium. Ce dernier framework est pas mal utilisé dans le chapitre, notamment pour l’écriture des tests fonctionnels (description de Selenium IDE et du module WebDriver). Enfin la notion de mocking n’est pas oubliée puisqu’elle est illustrée avec un exemple utilisant JMock et EasyMock.

Chapitre 15
Ce chapitre sur les design patterns est à mon avis un des plus importants car il liste les bonnes pratiques d’architecture et de conception. Et à mon avis l’auteur a fait un très bon travail en fournissant pas mal de conseils : comment gérer la session, l’historique du navigateur, les traitements longs avec les classes Timer et Scheduler, les patterns Commande, MVC et MVP, etc.

Chapitre 16
J’ai trouvé le chapitre dédié à UIBinder très exhaustif. On y voit la gestion des styles et ressources, l’incorporation des images, la gestion des évènements, le référencement de widgets composites à l’intérieur d’un widget composite…

Chapitre 17
Un très court chapitre qui prend la peine de faire un tour d’horizon du plug-in Eclipse pour GWT. Je pense qu’il montre bien ses possibilités.

Chapitre 18
Un chapitre est consacré aux composants CellWidget. J’ai bien apprécié la description et l’utilisation (nombreux extraits de code) du widget CellTable, très utilisé pour la création de tableaux. La documentation officielle de Google est très bonne sur le sujet mais des explications supplémentaires et de surcroît en français ne sont jamais de trop !

Chapitre 19
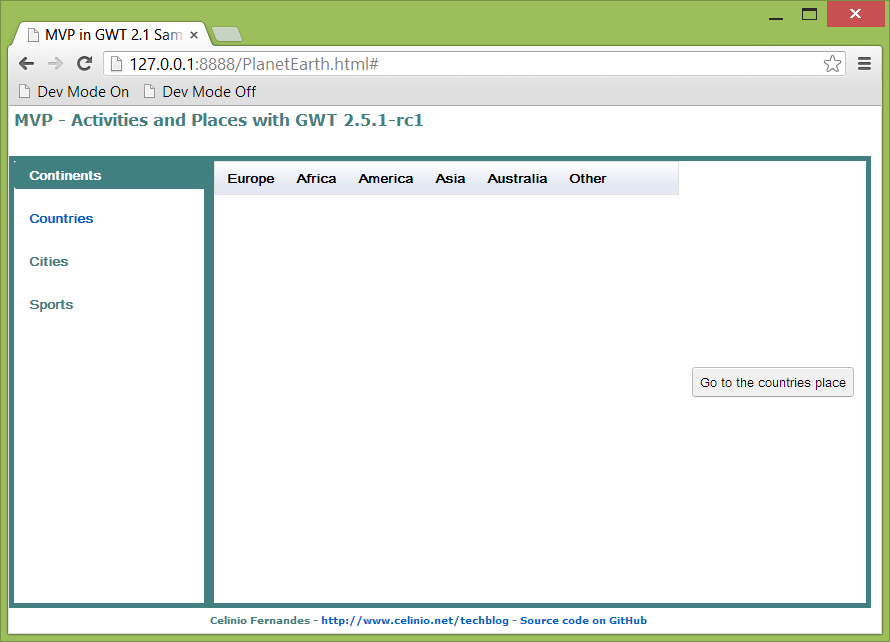
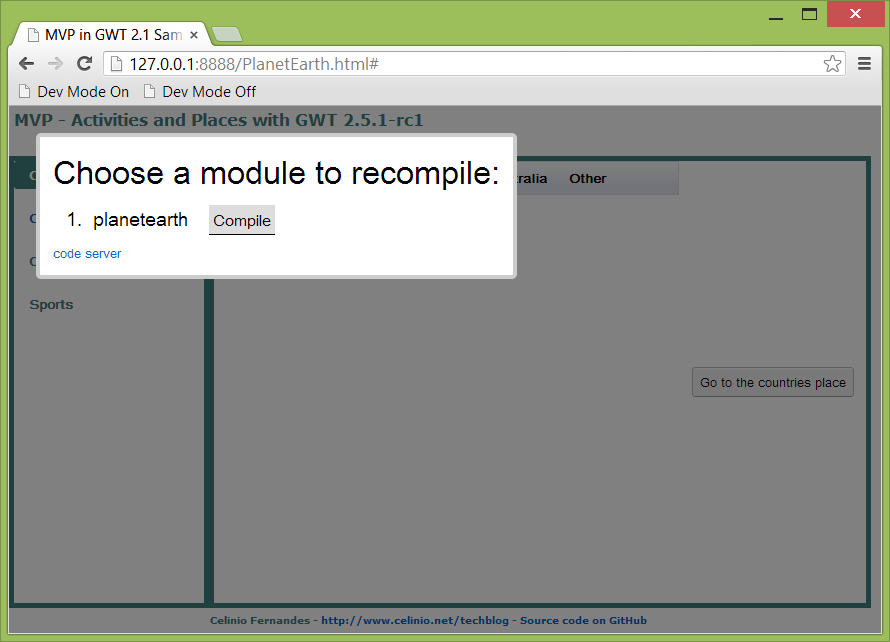
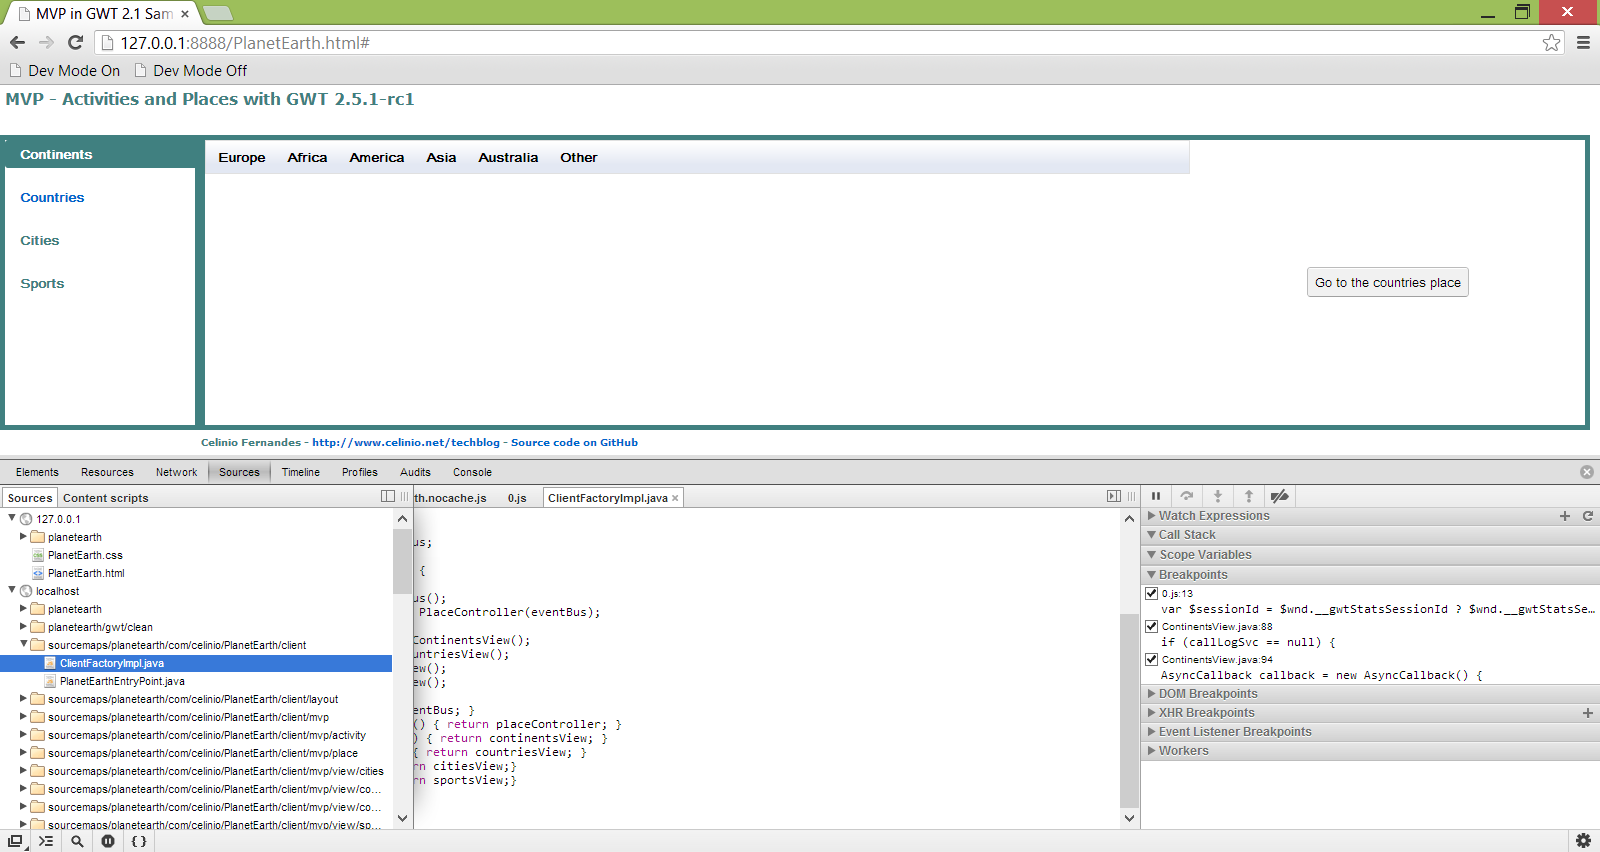
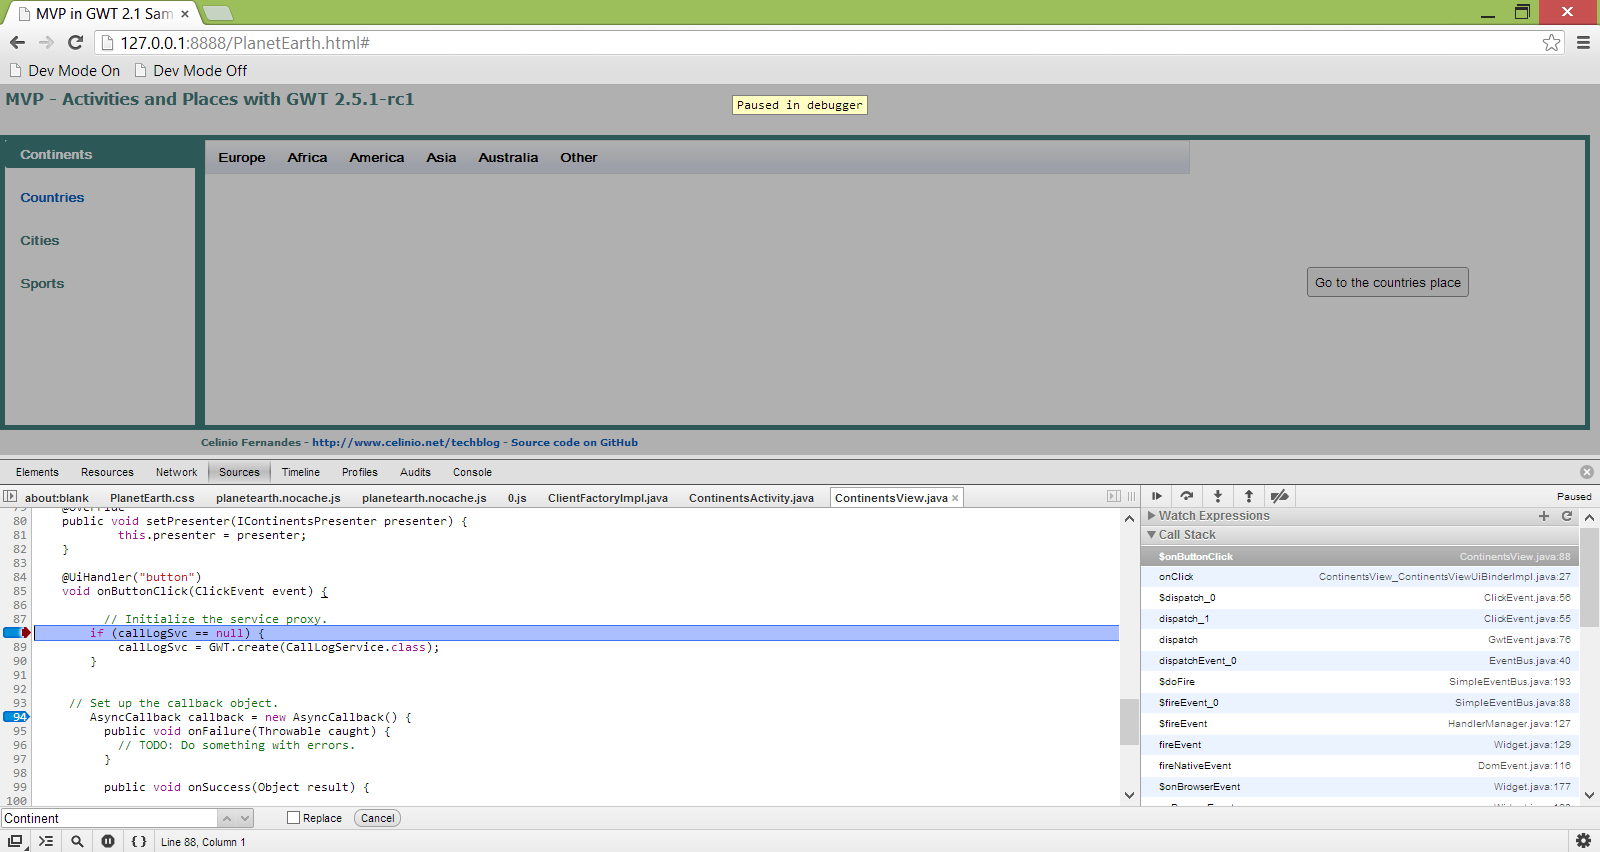
Enfin un chapitre dédié à l’API Activities and Places. À l’heure actuelle il existe encore peu d’ouvrages qui abordent en détail cette API et c’est un gros manque. Dans ce chapitre l’auteur explique longuement cette API complexe et l’illustre à l’aide d’un exemple et d’un schéma décrivant toute la chaîne d’exécution de l’API Activities and Places.

Chapitres 20 et 21
Ces deux derniers chapitres concernent les API RequestFactory, AutoBean et Editors. Tous les deux sont bien riches en code, explications, conseils et avertissements !

De manière générale j’ai beaucoup apprécié l’exhaustivité des explications fournies dans la plupart des chapitres. Mais aussi les conseils et avertissements sur certains sujets complexes.
J’ai aussi beaucoup apprécié l’apparition d’un chapitre entièrement dédié à Activities and Places. L’importance de ce framework dans le développement d’une application GWT mérite en effet un chapitre à lui tout seul et l’auteur a bien veillé à en inclure un mais a également produit un bel effort d’explications détaillées de cette API difficile pour la rendre plus compréhensible et plus assimilable.
Je n’ai a posteriori noté qu’un seul manque dans ce livre : une présentation un peu plus détaillée du super dev mode, qu’on avait annoncé comme une nouveauté très intéressante de la version 2.5. Mais cette fonctionnalité est relativement neuve, notamment au moment de l’écriture de cette deuxième édition du livre.

Sommaire

Introduction à GWT
Chapitre 1 : L’environnement de développement
Chapitre 2 : Les contrôles
Chapitre 3 : Le modèle de placement CSS
Chapitre 4 : Les bibliothèques tierces
Chapitre 5 : L’intégration de code JavaScript
Chapitre 6 : La création de composants personnalisés
Chapitre 7 : Les services RPC
Chapitre 8 : L’intégration J2EE
Chapitre 9 : Le chargement à la demande
Chapitre 10 : La liaison différée
Chapitre 11 : La gestion des ressources
Chapitre 12 : Sous le capot de GWT
Chapitre 13 : L’internationalisation
Chapitre 14 : L’environnement de tests
Chapitre 15 : Les design patterns GWT
Chapitre 16 : La création d’interfaces avec UIBinder
Chapitre 17 : Le plug-in Eclipse pour GWT
Chapitre 18 : Les composants CellWidget
Chapitre 19 : Activités et places
Chapitre 20 : L’API Request Factory
Chapitre 21 : L’API Editors

Categories: Book reviews, GWT Tags:

The future of GWT 2012 Report

December 13th, 2012 No comments

And here is the report :
https://vaadin.com/gwt/report-2012/

1300 respondents who answered 30 questions. The report is 20 pages and full of data, charts, stats and commentaries !

Here are some conclusions from the report :

  • compile time and widgets quality are the worst features of GWT
  • cross browser compatibility is the favorite feature
  • size of the uncompressed obfuscated JavaScript is mostly between 2M and 10M
  • most popular framework/API to use the MVP pattern is GWT 2.4 Activities and Places
  • backend communication is mainly done with GWT RPC
Categories: GWT, JavaScript, MVP Tags:

The future of GWT survey

September 19th, 2012 No comments

I want to relay this interesting survey from the GWT Steering Committee (and Vaadin).
You can take it here :

https://vaadin.com/blog/-/blogs/the-future-of-gwt-survey

Categories: GWT Tags:

[JPA 2] Criteria API and MetaModel

September 12th, 2012 No comments

I want to mention the Criteria API, a very cool API which in my opinion is not used as much as it should be. The developers who implement the specification (JSR 317: Java Persistence 2.0) do an impressive work. Thanks to them we have an API that makes it possible to write type safe queries in an object oriented way.
Usually Java developers write queries using JPQL or they write native queries. The fact is that the API Criteria has a (small) learning curve : you have to explore the API and study some basic queries examples before writing your own queries. The first time you use it, it does not seem as intuitive as JPQL.

The Criteria API is particularly convenient when writing queries which do not have a static where clause. For instance in the case of a web page where the user can make a research based on optional criterias. Then the generated query is not always the same.

The Criteria API has its advantages and its disadvantages : it produces typesafe queries that can be checked at compile time but on the other hand queries can be a bit hard to read (apparently unlike QueryDSL or EasyCriteria).
Another advantage is that it can help to avoid SQL injection since the user input is validated or escaped by the JDBC driver (which is not the case with native queries).

To create typesafe queries, one uses the canonical metamodel class associated to an entity (an idea originally proposed by Gavin King, as far as i know). A possible definition of a metamodel class could be that one : it is a class that provides meta information about a managed entity. By default, it has the same name as the entity plus an underscore. For instance if an entity is called Employee then the metamodel class is called Employee_. It is annotated with the annotation javax.persistence.StaticMetamodel.
Fortunately you do not have to write them, you can generate them using an annotation processor, through Eclipse or a Maven plugin for instance.
I chose to generate the metamodel classes with the help of the Hibernate Metamodel Generator (an annotation processor) and the maven-processor-plugin maven plugin, at each build so that they are updated whenever the entities are modified. It is a good way to keep the metamodel classes up to date.

<plugin>
<groupId>org.bsc.maven</groupId>
<artifactId>maven-processor-plugin</artifactId>
<version>2.0.5</version>
<dependencies>
<!-- Annotation processor to generate the JPA 2.0 metamodel classes for typesafe criteria queries -->
  <dependency>
    <groupId>org.hibernate</groupId>
    <artifactId>hibernate-jpamodelgen</artifactId>
    <version>1.2.0.Final</version>
  </dependency>
</dependencies>
<executions>
  <execution>
    <id>process</id>
    <goals>
      <goal>process</goal>
    </goals>
    <phase>generate-sources</phase>
    <configuration>
      <outputDirectory>${project.basedir}/src/main/.metamodel/</outputDirectory>
      <processors>
        <processor>org.hibernate.jpamodelgen.JPAMetaModelEntityProcessor</processor>
      </processors>
    </configuration>
  </execution>
</executions>
</plugin>

<!--  add sources (classes generated inside the .metamodel folder) to the build -->
<plugin>
<groupId>org.codehaus.mojo</groupId>
<artifactId>build-helper-maven-plugin</artifactId>
<version>1.7</version>
<executions>
  <execution>
    <id>add-source</id>
    <phase>generate-sources</phase>
    <goals>
      <goal>add-source</goal>
    </goals>
    <configuration>
      <sources>
        <source>${basedir}/src/main/.metamodel</source>
      </sources>
    </configuration>
  </execution>
</executions>
</plugin>

And here is the kind of dynamic query one can create :
Read more…

Categories: Criteria, Java, Java EE, JPA, JPQL Tags:

My presentation of GWT 2.4

June 6th, 2012 1 comment

I have recently done a presentation of GWT 2.4
It is now available on slideshare.net :

I might work on it again later. To make it a bit nicer.

Categories: Architecture, Eclipse, GWT, Java, Maven, MVP Tags:

How to launch the hosted mode with Jonas and Maven

April 23rd, 2012 No comments

GWT uses an embedded Jetty server. It is used at the beginning of the development of an application. During the prototype phase.
Personally, I used it for about a year, until we got the need to use JMS.
And since Jetty is not a Java EE server – it does not implement the JMS API – it was time to say goodbye to Jetty and use the application server that is used in production : Jonas.
There is not much info about the configuration to use in order to launch the hosted mode with a server different from Jetty. I found that the official website of the gwt-maven-plugin lacks information in that area.

I spent a few hours finding out the correct configuration for that. So here is how to do it :
1) Start Jonas
2) Deploy the application (EAR or WAR)
3) Run the goal gwt:run

And the configuration for the gwt-maven-plugin plugin is the following :


<plugins>
  <plugin>
	<groupId>org.codehaus.mojo</groupId>
	<artifactId>gwt-maven-plugin</artifactId>		
					
	<!-- Old configuration, to run the hosted mode with JETTY. -->
	<!-- 
		<configuration>
		<runTarget>identify.html</runTarget>
		<hostedWebapp>${project.build.directory}/${project.build.finalName}</hostedWebapp>
		<modules>
			<module>${project.groupId}.foo.bla.MainApplication</module>
			<module>${project.groupId}.foo.bla.SecondEntry</module>
		</modules>
		<copyWebapp>true</copyWebapp>										
		<extraJvmArgs>-XX:MaxPermSize=512M  -Xms512M -Xmx1024M </extraJvmArgs>
	</configuration>
	 -->
	
	<!-- New configuration, to run the hosted mode with JONAS -->
	<configuration>					
		<modules>
			<module>${project.groupId}.foo.bla.MainApplication</module>
			<module>${project.groupId}.foo.bla.SecondEntry</module>
		</modules>					
		<extraJvmArgs>-XX:MaxPermSize=512M  -Xms512M -Xmx1024M </extraJvmArgs>
		
		<webappDirectory>${project.build.directory}/${project.build.finalName}</webappDirectory> 
		<runTarget>http://localhost:9000/app-context/main.html</runTarget> 
		<copyWebapp>false</copyWebapp> 
		<!--  do not start JETTY -->
		<noServer>true</noServer>
		<!-- the folder where the exploded WAR is located, inside Jonas -->
		 <!--  Constant path if jonas.development=false in conf/jonas.properties --> 					
		<hostedWebapp>${env.JONAS_BASE}\work\webapps\jonas\ear\myapp-ear-SNAPSHOT.ear\${project.build.finalName}.war</hostedWebapp>
		<bindAddress>localhost</bindAddress>   <!--  other possible value : 0.0.0.0 -->
		<logLevel>INFO</logLevel> 
		<style>OBF</style> 			
	</configuration>
	<executions>
		<execution>
			<id>gwtcompile</id>
			<phase>prepare-package</phase>
			<goals>
				<goal>compile</goal>
			</goals>
		</execution>
	</executions>
   </plugin>
...
</plugins>			

Line 35 is the most important : it specifies the path where the exploded war is deployed in Jonas.
That configuration could work with another application server of course.

Categories: GWT, JOnAS, Maven Tags:

Read a properties file external to a webapp

April 9th, 2012 No comments

Externalizing part of the configuration of a webapp in a .properties file that is located outside of that webapp (outside the WAR, the EAR …) is a frequent requirement and I initially thought that the PropertyPlaceholderConfigurer class, provided by the Spring framework and which is an implementation of the BeanFactoryPostProcessor interface, would help me to get the values of the properties defined in that external file.
The properties are pulled into the application context definition file.
The typical sample code used to achieve this is the following :


<bean class="org.springframework.beans.factory.config.PropertyPlaceholderConfigurer">  
    <property name="locations">
      <list>
          <value>file:d:/temp/toto/myFile.properties</value>  
      </list>
     </property
</bean>

<bean id="smtpserverurl" class="com.vendor.SomeSmtpServer">  
    <property name="URL" value="${smtpserver.url}"/>  
</bean>  

or :

<context:property-placeholder location="file:d:/temp/toto/myFile.properties" />

<bean id="smtpserverurl" class="com.vendor.SomeSmtpServer">  
    <property name="URL" value="${smtpserver.url}"/>  
</bean>  

And the properties file :


smtpserver.url=smtp.gmail.com

It is a good solution as long as you do not need dynamic reloading of the properties, i.e. without the need for restarting the application whenever the properties values are changed.
So I find out that in that case the Apache Commons Configuration is a good alternative because it supports dynamic reloading of the properties.
And it is as easy to use as this :


package com.celinio.readprops;
import java.io.File;
import java.util.Iterator;

import org.apache.commons.configuration.ConfigurationException;
import org.apache.commons.configuration.PropertiesConfiguration;
import org.apache.commons.configuration.reloading.FileChangedReloadingStrategy;
import org.apache.log4j.Logger;

/**
 * This class reads properties that are stored in a file outside the webapp
 * @author Celinio Fernandes
 *
 */
public class ReadExternalPropertiesUtil {
		
	/**
	 * Logger for this class
	 */
	private static final Logger logger = Logger.getLogger(ReadExternalPropertiesUtil.class);

	private static final String PROPERTIES_FILE = "config.properties";
	private static final String ENV_VAR = "PROPERTIES_APP";
	public static String propertiesFolder;
	public static PropertiesConfiguration propertiesConfig  = null;
...

FileChangedReloadingStrategy strategy  = null;
strategy  = new FileChangedReloadingStrategy();
strategy.setRefreshDelay(reloadInterval);
propertiesConfig.setReloadingStrategy(strategy);
propertiesConfig.setDelimiterParsingDisabled(true);

...

Line 23 : the path is given as an environment variable.

It works great. The only problem that I met was when I tested the reload interval (the delay period before the configuration file’s last modification date is checked again, to avoid permanent disc access on successive property lookups), it did not work : if i set the reload interval to 30 seconds for instance and if i modify the properties several times during that delay period, the new property values are still displayed. I would have expected to get the old values again, until the delay period expired.
The source code for this sample webapp is available at http://code.google.com/p/celinio/source/browse/#svn%2Ftrunk%2Fpropreloadable

Securing a GWT application with AOP

March 12th, 2012 No comments

AOP can be a good solution to protect the business methods in an application developed with (or without) GWT.
If we have a method called displayCustomerData(…) and we want to make sure only a certain category of users can call it, for instance the category MANAGER, then AOP can come to the rescue.

I used AspectJ and Spring AOP to implement that. One should not be surprised to notice a tight integration of AOP in Spring since the spec lead for AspectJ is Adrian Coyler, who is also one of the main Spring committers.

0) First, add the needed dependencies with Maven :

<dependency>
	<groupId>org.springframework</groupId>
	<artifactId>spring-aop</artifactId>
	<version>3.0.6.RELEASE</version>
</dependency>

<!-- ASPECTJ dependencies -->
<!-- ******************** -->			
<dependency>
	<groupId>org.aspectj</groupId> 
	<artifactId>aspectjrt</artifactId>
	<version>1.6.12</version> 
</dependency>
							
<dependency>
	<groupId>aspectj</groupId>
	<artifactId>aspectjweaver</artifactId>
	<version>1.5.4</version>
</dependency>	

1) Then create your own annotation

package com.myproject.aop;
import java.io.Serializable;

public enum RoleEnumDto implements Serializable {
	MANAGER, SUPERVISER, BASIC_USER;
}

package com.myproject.aop;
import java.io.Serializable;

@Retention(RetentionPolicy.RUNTIME)
@Target( { ElementType.METHOD })
@Inherited
public @interface AuthorizedRoles {

	RoleEnumDto[] value();
}


2) Then add the AspectJ and Spring dependencies


<?xml version="1.0" encoding="UTF-8"?>
<beans xmlns="http://www.springframework.org/schema/beans"
    xmlns:xsi="http://www.w3.org/2001/XMLSchema-instance"
    xmlns:aop="http://www.springframework.org/schema/aop" 
    xsi:schemaLocation="http://www.springframework.org/schema/beans   

http://www.springframework.org/schema/beans/spring-beans-3.0.xsd


http://www.springframework.org/schema/aop

       http://www.springframework.org/schema/aop/spring-aop-3.0.xsd ">	
	
	<!-- Enable the @AspectJ support. -->
	<aop:aspectj-autoproxy/>

	<bean id="checkAuthorizedRoles" class="com.myproject.aop.CheckAuthorizedRoleAspect"   />

</beans>

3) Then develop the aspect, which is a class annotated with @Aspect.


package com.myproject.aop;

import java.lang.annotation.Annotation;
import java.lang.reflect.Method;
import java.util.Arrays;
import java.util.List;

import javax.servlet.http.HttpServletRequest;
import javax.servlet.http.HttpSession;

import org.apache.log4j.Logger;
import org.aspectj.lang.JoinPoint;
import org.aspectj.lang.ProceedingJoinPoint;
import org.aspectj.lang.annotation.Around;
import org.aspectj.lang.annotation.Aspect;
import org.aspectj.lang.annotation.Before;
import org.springframework.core.annotation.Order;
import org.aspectj.lang.annotation.Pointcut;
import org.aspectj.lang.reflect.MethodSignature;
import org.springframework.web.context.request.RequestAttributes;
import org.springframework.web.context.request.RequestContextHolder;
import org.springframework.web.context.request.ServletRequestAttributes;


@Order(0)
@Aspect
public class CheckAuthorizedRoleAspect {
	
private static final Logger log = Logger.getLogger(CheckAuthorizedRoleAspect.class);
	
/**
 * The pointcut expression where to bind the advice
 */
@Pointcut("  @annotation(com.myproject.AuthorizedRoles)")
private void businessMethods() {		
	log.debug("Entering businessMethods()");		
}// the pointcut signature
	
	
 @Before("businessMethods()")
 public void checkAuthorizedAdvice(JoinPoint joinPoint, AuthorizedRoles authorizedRoles) throws    ForbiddenAccessException {
  log.debug("Entering checkAuthorizedAdvice()");
  log.debug(joinPoint.getSignature().getName());

  // Do some role checking 
  // 1. Proceed the method if the user has the required role
  if (...) {
          return pjp.proceed();
  //2. Throw an exception if not.
  else {
  throw new ForbiddenAccessException ("The user is not allowed to call this method");
  }
 }
	 		 
}

The @Order(0) annotation is useful in the case where a jointpoint can be intercepted by several aspects.
The annotation AuthorizedRoles is passed as a parameter to the checkAuthorizedAdvice(…) method, which is the advice.
The pointcut expression matches all methods annotated with the AuthorizedRoles annotation.

4) Finally, add the annotation to the business method you want to restrict the access to. This business method can be called by the implementation of an RPC service for instance :


@Override
@Transactional(rollbackFor = SomeException.class)
@AuthorizedRoles( { RoleEnumDto.MANAGER, RoleEnumDto.SUPERVISER })
public Customer displayCustomerData(long id) throws NotFoundException {
		...
}

Pretty easy and pretty powerful.

Categories: AOP, AspectJ, GWT, Spring, Spring AOP Tags:

Resize Internet Explorer to the resolution of your choice without tweaking the OS settings

February 22nd, 2012 No comments

Tested on IE7 and IE9.
Here is a useful way to change the resolution of Internet Explorer if you need to test
a webapp on a specific resolution. It is pretty useful if you do not want to change the OS settings and/or if you need to test several resolutions.

In IE, you create bookmarklets which are JavaScript scripts that are intended to be run from a web browser’s bookmarks bar or menu.

  1. Add a favorite (shortcut : CTRL+D)
  2. Choose a name (for instance : 1024×768)
  3. Display the favorites
  4. Right-click on the favorite and edit its properties
  5. Add the URL : javascript:(function(){ window.resizeTo(1024,768); })();
  6. Click OK. On IE7, you get a warning message (“JavaScript is not a recognized protocole”). Ignore it.
  7. Follow the same steps to add another bookmarklet for another resolution.
    Then to change the resolution, you just need to select the favorite.

I quickly tried it on Firefox 10, it does not work. If anyone figures it out, please let me know.
Did Firefox take away the ability to use javascript: in the address bar ?
javascript:alert(7*45) does not even work in FF 10 (?!?)
Some discussion that i found on the matter : https://bugzilla.mozilla.org/show_bug.cgi?id=688841

Categories: General Tags:

M2E problem : Plugin execution not covered by lifecycle configuration

February 18th, 2012 No comments

I am adding to the blogosphere of development-related blogs another post about the “Plugin execution not covered by lifecycle configuration” error.

The M2E Plugin 1.0.0 is integrated into Eclipse Indigo (3.7). Apparently, M2E connectors, which are a bridge between Maven and Eclipse, require to provide a connector for every plugin that is used in the build.
And if no connector is available, M2E shows the following annoying errors in the Eclipse problems view :

Plugin execution not covered by lifecycle configuration: org.apache.maven.plugins:maven-antrun-plugin:1.7:run (execution: run, phase: validate)

Plugin execution not covered by lifecycle configuration: org.apache.maven.plugins:maven-resources-plugin:2.5:resources (execution: default-resources, phase: process-resources)

Plugin execution not covered by lifecycle configuration: org.apache.maven.plugins:maven-resources-plugin:2.5:testResources (execution: default-testResources, phase: process-test-resources)

Plugin execution not covered by lifecycle configuration: org.codehaus.mojo:properties-maven-plugin:1.0-alpha-2:read-project-properties (execution: default, phase: initialize)

Plugin execution not covered by lifecycle configuration: org.apache.cxf:cxf-codegen-plugin:2.2:wsdl2java (execution: generate-sources, phase: generate-sources)

Plugin execution not covered by lifecycle configuration: org.codehaus.mojo:hibernate3-maven-plugin:3.0-SNAPSHOT:hbm2ddl (execution: default, phase: compile)

Plugin execution not covered by lifecycle configuration: org.apache.maven.plugins:maven-ear-plugin:2.6:generate-application-xml

To avoid these errors, it is necessary to modify the pom.xml file so that M2E will not complain about it.

These are the extra lines that I added in my parent pom.xml :

	<build>
<pluginManagement>
	<plugins>
	<!--The configuration of this plugin is used to store the Eclipse M2E settings
                  only. It has no influence on the Maven build itself. -->
	<plugin>
		      <groupId>org.eclipse.m2e</groupId>
		      <artifactId>lifecycle-mapping</artifactId>
		      <version>1.0.0</version>
		      <configuration>
		        <lifecycleMappingMetadata>
		          <pluginExecutions>
		            <pluginExecution>
		              <pluginExecutionFilter>
		                <groupId>org.apache.maven.plugins</groupId>
		                <artifactId>maven-antrun-plugin</artifactId>
		                <versionRange> [1.7,)</versionRange>
		                <goals>
		                       <!-- plugin goals-->
		                  <goal>run</goal>
		                </goals>
		              </pluginExecutionFilter>
		              <action>
		             	 <!-- M2E should ignore the plugin-->
		                <ignore />
		              </action>
		            </pluginExecution>
		            <pluginExecution>
		              <pluginExecutionFilter>
		                <groupId>org.apache.maven.plugins</groupId>
		                <artifactId>maven-resources-plugin</artifactId>
		                <versionRange> [2.5,)</versionRange>
		                <goals>
		                       <!-- plugin goals-->
		                  <goal>resources</goal>
		                  <goal> testResources </goal>
		                </goals>
		              </pluginExecutionFilter>
		              <action>
		             	 <!-- M2E should ignore the plugin-->
		                <ignore />
		              </action>
		            </pluginExecution>
		            <pluginExecution>
		              <pluginExecutionFilter>
		                <groupId>org.codehaus.mojo</groupId>
		                <artifactId>properties-maven-plugin</artifactId>
		                <versionRange> [1.0-alpha-2,)</versionRange>
		                <goals>
		                       <!-- plugin goals-->
		                  <goal>read-project-properties</goal>
		                </goals>
		              </pluginExecutionFilter>
		              <action>
		             	 <!-- M2E should ignore the plugin-->
		                <ignore />
		              </action>
		            </pluginExecution>
		            <pluginExecution>
		              <pluginExecutionFilter>
		                <groupId>org.apache.cxf</groupId>
		                <artifactId>cxf-codegen-plugin</artifactId>
		                <versionRange> [2.2,)</versionRange>
		                <goals>
		                       <!-- plugin goals-->
		                  <goal>wsdl2java</goal>
		                </goals>
		              </pluginExecutionFilter>
		              <action>
		             	 <!-- M2E should ignore the plugin-->
		                <ignore />
		              </action>
		            </pluginExecution>
		            <pluginExecution>
		              <pluginExecutionFilter>
		                <groupId>org.codehaus.mojo</groupId>
		                <artifactId>hibernate3-maven-plugin</artifactId>
		                <versionRange> [3.0-SNAPSHOT,)</versionRange>
		                <goals>
		                       <!-- plugin goals-->
		                  <goal>hbm2ddl</goal>
		                </goals>
		              </pluginExecutionFilter>
		              <action>
		             	 <!-- M2E should ignore the plugin-->
		                <ignore />
		              </action>
		            </pluginExecution>
		                  <pluginExecution>
		              <pluginExecutionFilter>
		                <groupId>org.apache.maven.plugins</groupId>
		                <artifactId>maven-ear-plugin</artifactId>
		                <versionRange> [2.6,)</versionRange>
		                <goals>
		                       <!-- plugin goals-->
		                  <goal>generate-application-xml</goal>
		                </goals>
		              </pluginExecutionFilter>
		              <action>
		             	 <!-- M2E should ignore the plugin-->
		                <ignore />
		              </action>
		            </pluginExecution>
		          </pluginExecutions>
		        </lifecycleMappingMetadata>
		      </configuration>
  	</plugin>
...
  </plugins>
      </pluginManagement>
</build>

Links :
http://wiki.eclipse.org/M2E_plugin_execution_not_covered
http://objectledge.org/confluence/display/TOOLS/M2E+Connectors

Categories: Eclipse, Java, Maven Tags:

Coding my first Android application

January 1st, 2012 No comments

I finally got the time to develop my first small Android application.
Technical environment :
- Eclipse Indigo
- Android SDK 2.3.3 (Gingerbread)
- An Android phone with Android SDK 2.3.4

I tried to go a little bit further than the traditional “Hello World” sample.
The application, called TeamManagement, is still a simple one : type in a name of a project member and it will display what his role is and when he arrived in the project. That’s it. I explored some nice features : relative layout, autocompletion, popup, menu at the bottom, show/remove image etc.

Main

The project inside Eclipse has the following structure :

The file /MyProject/res/values/strings.xml is where the name of the application is set.

<string name="app_name">TeamManagement 1.0</string>

I chose to organize the layout programatically, instead of declaratively (main.xml) and created a single activity called MyProjectActivity :
Read more…

Categories: Android, Eclipse, Java Tags:

Extracting metadata information from files using Apache Tika

December 11th, 2011 1 comment

I recently discovered a useful library called Apache Tika that makes it easy to extract metadata information from many types of files.
The ECM Alfresco makes use of Apache Tika for both metadata extraction and content transformation.
With Apache Tika, you do not have to worry about which parser to use with a type of file. Apache Tika will look for a parser implementation that matches the type of the document, once it is known, using Mime Type detection.
Here is a basic usage of the library to extract metadata information from files such as documents (PDF/DOC/XLS), images (JPG), songs (MP3).

You can start from a maven archetype such as quickstart. Then all you need is to add the following two dependencies :

<dependencies>
...
 <dependency>
	            <groupId>org.apache.tika</groupId>
	            <artifactId>tika-core</artifactId>
	            <version>1.0</version>
 </dependency>
 <dependency>
	            <groupId>org.apache.tika</groupId>
	            <artifactId>tika-parsers</artifactId>
	            <version>1.0</version>
 </dependency>
</dependencies>

The org.apache.tika.parser.AutoDetectParser class is in charge of dispatching the incoming document to the appropriate parser. It is especially useful when the type of the document is not known in advance.

package net.celinio.tika.firstProject;

import java.io.File;
import java.io.FileInputStream;
import java.io.InputStream;

import org.apache.tika.metadata.Metadata;
import org.apache.tika.parser.AutoDetectParser;
import org.apache.tika.sax.BodyContentHandler;

public class MetaDataExtraction {

	public static void main(String[] args) {
		 
		try {
			//String resourceLocation = "d:\\tempTika\\TikainAction.pdf";
			//String resourceLocation = "d:\\tempTika\\06-takefive.mp3";			
			String resourceLocation = "d:\\tempTika\\mariniere14juillet2011.jpg";
			//String resourceLocation = "d:\\tempTika\\02b-blank-timetable.doc";
			//String resourceLocation = "d:\\tempTika\\examstudytable.doc";
			//String resourceLocation = "d:\\tempTika\\timetable.xls";
			
			File file = new File(resourceLocation);
			 
			InputStream input = new FileInputStream(file);			 
			System.out.println( file.getPath());				
			
			Metadata metadata = new Metadata();
			 
			BodyContentHandler handler = new BodyContentHandler(10*1024*1024);
			AutoDetectParser parser = new AutoDetectParser();		
	
			parser.parse(input, handler, metadata);
			 /*
			String content = new Tika().parseToString(f);
			//System.out.println("Content: " + content);
			//System.out.println("Content: " + handler.toString());
			System.out.println("Title: " + metadata.get(Metadata.TITLE));
			System.out.println("Last author: " + metadata.get(Metadata.LAST_AUTHOR));
			System.out.println("Last modified: " + metadata.get(Metadata.LAST_MODIFIED));
			System.out.println("Content type: " + metadata.get(Metadata.CONTENT_TYPE));
			System.out.println("Application name: " + metadata.get(Metadata.APPLICATION_NAME));
			System.out.println("Author: " + metadata.get(Metadata.AUTHOR));
			System.out.println("Line count: " + metadata.get(Metadata.LINE_COUNT));
			System.out.println("Word count: " + metadata.get(Metadata.WORD_COUNT));
			System.out.println("Page count: " + metadata.get(Metadata.PAGE_COUNT));
			System.out.println("MIME_TYPE_MAGIC: " + metadata.get(Metadata.MIME_TYPE_MAGIC));
			System.out.println("SUBJECT: " + metadata.get(Metadata.SUBJECT));
			
			*/

			String[] metadataNames = metadata.names();
			
			// Display all metadata
			for(String name : metadataNames){
				System.out.println(name + ": " + metadata.get(name));
			}
			
			}
			catch (Exception e) {
				e.printStackTrace();
			}
			 
	}
}

Line 30, I am using the BodyContentHandler constructor that takes an argument because i need to increase the size limit. Otherwise the WriteLimitReachedException exception is raised when parsing the file TikainAction.pdf (16,4 MB) :

org.apache.tika.sax.WriteOutContentHandler$WriteLimitReachedException: 
Your document contained more than 100000 characters, and so your requested limit has been reached. To receive the full text of the document, increase your limit. (Text up to the limit is however available).

Here is the output for the image file mariniere14juillet2011.jpg :

d:\tempTika\mariniere14juillet2011.jpg
Number of Components: 3
Windows XP Title: Popo
Date/Time Original: 2011:07:14 14:16:10
Image Height: 600 pixels
Image Description: Popo
Data Precision: 8 bits
Sub-Sec Time Digitized: 31
tiff:BitsPerSample: 8
Windows XP Subject: Moules
date: 2011-07-14T14:16:10
exif:DateTimeOriginal: 2011-07-14T14:16:10
Component 1: Y component: Quantization table 0, Sampling factors 2 horiz/2 vert
tiff:ImageLength: 600
Component 2: Cb component: Quantization table 1, Sampling factors 1 horiz/1 vert
Component 3: Cr component: Quantization table 1, Sampling factors 1 horiz/1 vert
Date/Time Digitized: 2011:07:14 14:16:10
description: Popo
tiff:ImageWidth: 800
Unknown tag (0xea1c): 28 -22
Image Width: 800 pixels
Sub-Sec Time Original: 31
Content-Type: image/jpeg
Artist: Popo;Cel
Windows XP Author: Popo;Cel

And the output for the song file 06-takefive.mp3 :

d:\tempTika\06-takefive.mp3
xmpDM:releaseDate: null
xmpDM:audioChannelType: Stereo
xmpDM:album: Take Five
Author: Dave Brubeck
xmpDM:artist: Dave Brubeck
channels: 2
xmpDM:audioSampleRate: 44100
xmpDM:logComment: null
xmpDM:trackNumber: 6/8
version: MPEG 3 Layer III Version 1
xmpDM:composer: null
xmpDM:audioCompressor: MP3
title: Take Five
samplerate: 44100
xmpDM:genre: null
Content-Type: audio/mpeg

And the output for the ebook TikainAction.pdf :

d:\tempTika\TikainAction.pdf
xmpTPg:NPages: 257
Creation-Date: 2011-11-09T12:20:20Z
title: Tika in Action
created: Wed Nov 09 13:20:20 CET 2011
Licensed to: Celinio Fernandes  <xxx@yyy.com>
Last-Modified: 2011-11-16T12:25:00Z
producer: Acrobat Distiller 9.4.6 (Windows)
Author: Chris A. Mattmann, Jukka L. Zitting
Content-Type: application/pdf
creator: FrameMaker 8.0

And the output for the Word document 02b-blank-timetable.doc :

d:\tempTika\02b-blank-timetable.doc
Revision-Number: 4
Comments: 
Last-Author: CeLTS
Template: Normal.dot
Page-Count: 1
subject: 
Application-Name: Microsoft Office Word
Author: CeLTS
Word-Count: 1921
xmpTPg:NPages: 1
Edit-Time: 3600000000
Creation-Date: 2006-02-09T00:31:00Z
title: Study Timetable
Character Count: 10951
Company: Monash University
Content-Type: application/msword
Keywords: 
Last-Save-Date: 2006-10-30T05:52:00Z

As you can see, the list of metadata information (title, author, image height, etc) is varying, depending on which parser is used and of course which type of document it is.
You can also search the content of the files as Apache Tika provides access to the textual content of files.
By the way, there is a Tika GUI which is a handy tool that makes it possible to extract metadata information by simply drag and dropping a file into it.
To launch it, just download the jar tika-app-1.0.jar and run it :

java -jar tika-app-1.0.jar --gui


Drag and drop a file into it and read the extracted metadata :

Links :

http://tika.apache.org/
The book Tika in Action (Manning)

Categories: Apache Tika, Maven Tags:

Handling form-based file upload with GWT and the Apache Jakarta Commons FileUpload library

November 27th, 2011 No comments

Uploading files to a filesystem, a remote server, a database, etc, is a frequent need in web applications.
These files are often multipart data (that is of varying types such as XML, HTML, plain text, binary … ).
With GWT, a good solution to handle this need is the use of the Apache Jakarta Commons FileUpload library.

First, generate a skeleton project using the gwt-maven-plugin archetype :

mvn archetype:generate  

Choose archetype number 298 which makes use of the gwt-maven-plugin and generates a simple hello world sample.

298: remote -> gwt-maven-plugin (Maven plugin for the Google Web Toolkit.)

You can easily import that project into Eclipse (File > Import …> Maven > Existing Maven projects).

Add the following dependency to the pom.xml file:

<dependency>
    <groupId>commons-fileupload</groupId>
    <artifactId>commons-fileupload</artifactId>
    <version>1.2.2</version>
</dependency>

In the client side, modify the onModuleLoad() method of the entry point class (called Firstmodule.java in my project) and add the following code at the end :

package com.mycompany.client;

import com.google.gwt.core.client.EntryPoint;
import com.google.gwt.core.client.GWT;
import com.google.gwt.event.dom.client.ClickEvent;
import com.google.gwt.event.dom.client.ClickHandler;
import com.google.gwt.event.dom.client.KeyCodes;
import com.google.gwt.event.dom.client.KeyUpEvent;
import com.google.gwt.event.dom.client.KeyUpHandler;
import com.google.gwt.user.client.rpc.AsyncCallback;
import com.google.gwt.user.client.ui.Button;
import com.google.gwt.user.client.ui.DialogBox;
import com.google.gwt.user.client.ui.FileUpload;
import com.google.gwt.user.client.ui.FormPanel;
import com.google.gwt.user.client.ui.HTML;
import com.google.gwt.user.client.ui.Label;
import com.google.gwt.user.client.ui.RootPanel;
import com.google.gwt.user.client.ui.TextBox;
import com.google.gwt.user.client.ui.VerticalPanel;
import com.mycompany.shared.FieldVerifier;

/**
 * Entry point classes define <code>onModuleLoad()</code>.
 */
public class Firstmodule implements EntryPoint {
...
 /**
   * This is the entry point method.
   */
  public void onModuleLoad() {
...
 final FormPanel form = new FormPanel();	  
    VerticalPanel vPanel = new VerticalPanel(); 
    // http://google-web-toolkit.googlecode.com/svn/javadoc/latest/com/google/gwt/user/client/ui/FileUpload.html
    form.setMethod(FormPanel.METHOD_POST);
    //The HTTP request is encoded in multipart format. 
    form.setEncoding(FormPanel.ENCODING_MULTIPART); //  multipart MIME encoding
    form.setAction("/FileUploadGreeting"); // The servlet FileUploadGreeting
    
    form.setWidget(vPanel);
    
    FileUpload fileUpload = new FileUpload();
    fileUpload.setName("uploader"); // Very important    
    vPanel.add(fileUpload);    
    
    Label maxUpload =new Label();
    maxUpload.setText("Maximum upload file size: 1MB");
    vPanel.add(maxUpload);
        
    vPanel.add(new Button("Submit", new ClickHandler() {
        public void onClick(ClickEvent event) {
                form.submit();
        }
    }));
    
    RootPanel.get("uploadContainer").add(form); 
...
}     
}

You need to add the FileUpload widget inside a FormPanel widget. Set the action (servlet) that will be called when the user submits the form.
Line 43 is very important. You need to set a name to the FileUpload widget, otherwise the upload will not work. In fact, all of the fields under the FormPanel that you want to use need to have a name so that the HttpServlet can identify them.
The HTTP request is encoded in multipart format (line 37).
The generated HTML code will contain the following line :

<form action="FileUploadGreeting" method="POST" enctype="multipart/form-data">

In the server side, create the servlet that will be called when the user clicks on the Submit button :

package com.mycompany.server.form;

import java.io.File;
import java.io.IOException;
import java.io.PrintWriter;
import java.util.Iterator;
import java.util.List;

import javax.servlet.ServletException;
import javax.servlet.http.HttpServlet;
import javax.servlet.http.HttpServletRequest;
import javax.servlet.http.HttpServletResponse;

import org.apache.commons.fileupload.FileItem;
import org.apache.commons.fileupload.FileItemFactory;
import org.apache.commons.fileupload.FileUploadBase.SizeLimitExceededException;
import org.apache.commons.fileupload.FileUploadException;
import org.apache.commons.fileupload.disk.DiskFileItemFactory;
import org.apache.commons.fileupload.servlet.ServletFileUpload;

public class UploadFileHandler extends HttpServlet {
	
	private static final long serialVersionUID = 1L;
	
	public void doPost(HttpServletRequest request, HttpServletResponse response)
	throws ServletException, IOException {
			
	 System.out.println("Inside doPost");		
		
		// Create a factory for disk-based file items
		FileItemFactory factory = new DiskFileItemFactory();
		// Create a new file upload handler
		ServletFileUpload fileUpload  = new ServletFileUpload(factory);
		// sizeMax - The maximum allowed size, in bytes. The default value of -1 indicates, that there is no limit.
		// 1048576 bytes = 1024 Kilobytes = 1 Megabyte
		fileUpload.setSizeMax(1048576);  
		
		if (!ServletFileUpload.isMultipartContent(request)) {
		      try {
		    	
				throw new FileUploadException("error multipart request not found");
			} catch (FileUploadException e) {
				// TODO Auto-generated catch block
				e.printStackTrace();
			}
		}
		 		  		
		try {

			List<FileItem> items = fileUpload.parseRequest(request);
			
			if (items == null) {			
                response.getWriter().write("File not correctly uploaded");
                return;
          }
			
			Iterator<FileItem> iter = items.iterator();

			while (iter.hasNext()) {
				FileItem item = (FileItem) iter.next();
				
				////////////////////////////////////////////////
				// http://commons.apache.org/fileupload/using.html								
				////////////////////////////////////////////////

				//if (item.isFormField()) {															
					String fileName = item.getName();
					System.out.println("fileName is : " + fileName);	
					String typeMime = item.getContentType();
					System.out.println("typeMime is : " + typeMime);	
					int sizeInBytes = (int) item.getSize();
					System.out.println("Size in bytes is : " + sizeInBytes);	
					//byte[] file = item.get();					
					item.write(new File("fileOutput.txt"));		        							
				//}
			}
			
			PrintWriter out = response.getWriter();
			response.setHeader("Content-Type", "text/html");
			out.println("Upload OK");
			out.flush();
			out.close();

		} catch (SizeLimitExceededException e) {
			System.out.println("File size exceeds the limit : 1 MB!!" );			
		} catch (Exception e) {
			e.printStackTrace();
			PrintWriter out = response.getWriter();
			response.setHeader("Content-Type", "text/html");
			out.println("Error");
			out.flush();
			out.close();
		}
		
	}
	
	public void doGet(HttpServletRequest request, HttpServletResponse response) throws ServletException, IOException {
		doPost(request, response);
	}

}

You can easily set a size limit for uploaded files (line 36). An SizeLimitExceededException exception is raised if the size exceeds the limit (line 84).
The parseRequest(…) method, line 50, returns the list of items that were submitted.
The method isFormField() determines whether or not an item is a plain form field, as opposed to a file upload. I have commented it out at line 66 because the form only contains one field, which is the uploaded file.
You can also easily get information about the uploaded file (name, size, typeMime).
In the end, i simply write the uploaded file into a new file called fileOutput.txt which is saved at the root of the project.

Update the deployment descriptor file to declare the servlet and map it to an URL:

 <!-- Upload -->
	<servlet>
		<servlet-name>FileUploadGreeting</servlet-name>
		<servlet-class>com.mycompany.server.form.UploadFileHandler</servlet-class>
	</servlet>
	
	<servlet-mapping>
		<servlet-name>FileUploadGreeting</servlet-name>
		<url-pattern>/FileUploadGreeting</url-pattern>
	</servlet-mapping>

Finally compile and run the project in GWT Development Mode. Right-click anywhere in the Project Explorer and choose “Run As -> Maven Build…” and run the “gwt:run” goal:

Here is a screenshot of the page with the FileUpload widget added:

The whole code is available on GitHub : https://github.com/longbeach/GWTCommonsFileUpload

Links :
http://www.ietf.org/rfc/rfc1867.txt

Categories: Git, GWT, Maven, RIA and RDA, SCM Tags:

Blinking 8 leds with the Arduino microcontroller board

November 6th, 2011 No comments

I put on YouTube a short video that I made of the breadboard and the Arduino, with 8 leds blinking in a sequence.
The C code for that sketch is here : http://ardx.org/src/circ/CIRC02-code.txt
It is a very easy exercise but also where one can start writing his own programs, for instance to try to modify the sequence of the blinking lights.

Categories: Arduino, C Tags:

Lightning my first led with the Arduino Uno microcontroller board

November 5th, 2011 No comments

And now for something new – at least for me – here is some electronics programming.
I got the chance to meet a coworker who is very much into it and he was nice enough to provide me with the basic information to get started. So the first thing I did was ordering the SparkFun inventor’s kit.
I just received it and it comes with a booklet that provides a few exercises.
That kit also contains an Arduino Uno microcontroller that you can connect to a computer through the USB port.
There is an Arduino IDE that comes with samples. These samples are programs written in C.
A program is called a sketch. You can easily upload it to the Arduino microcontroller, through the Arduino IDE menu. Here is the code (very simple) to turn on an LED for 1 second only, then off for 5 seconds, repeatedly :

void setup() {                
  // initialize the digital pin as an output.
  // Pin 13 has an LED connected on most Arduino boards:
  pinMode(13, OUTPUT);     
}

void loop() {
  digitalWrite(13, HIGH);   // set the LED on
  delay(1000);              // wait for a second
  digitalWrite(13, LOW);    // set the LED off
  delay(5000);              // wait for 5 seconds
}

Actually, these methods need to be wrapped up into a main method and you need to include WProgram.h but the Arduino IDE does it for you. A plugin for Eclipse also exists, you can find it here.
Pluging the different parts (pin headers, led, wires, resistor) to the breadboard and the Arduino board is a piece of cake :

There is one layout sheet per exercise to pin to the breadboard (on the left).

Links :
http://www.arduino.cc
http://robotmill.com/2011/02/12/arduino-basics-blink-an-led/

Categories: Arduino, C Tags:

Generate the database schema with Hibernate3 Maven Plugin

October 19th, 2011 No comments

There is a nice Maven plugin for JPA/Hibernate that makes it possible to quickly generate the database schema (SQL) and save it in a file.
The artifactId of this plugin is hibernate3-maven-plugin.
It will scan all JPA annotations in the class files of the entities and generate the corresponding SQL queries.
A persistence.xml file is required.

  1. With version 2.2 :

Content of the pom.xml :


<build>
  <plugins>
...
<plugin>
				<groupId>org.codehaus.mojo</groupId>
				<artifactId>hibernate3-maven-plugin</artifactId>	
                                <version>2.2</version>			
				<configuration>
		       	   <components>
						<component>
							<name>hbm2ddl</name>
							<implementation>jpaconfiguration</implementation>																									
						</component>							
					</components>
				   <componentProperties>
                    <drop>true</drop>
                    <create>true</create>
                    <export>false</export>
                    <format>true</format>                    <outputfilename>schema-${DataBaseUser}-${DatabaseName}.sql</outputfilename>
                    <persistenceunit>myPU</persistenceunit>
                    <propertyfile>src/main/resources/database.properties</propertyfile>
                </componentProperties>
			  </configuration>		
			  <dependencies>
			  	<dependency>
					<groupId>com.oracle</groupId>
					<artifactId>ojdbc14</artifactId>
					<version>10.2.0.2.0</version>
				</dependency>			  
			  </dependencies>					
		</plugin>
	  </plugins>
	</build>

Read more…

Categories: Hibernate, JPA, Maven, Oracle Tags:

Load balancing with Apache, mod_jk and Jonas

October 9th, 2011 No comments

Here are the quick steps to configure a cluster of Jonas instances, with Apache and the module mod_jk.

Instance HTTP AJP Connector jvmRoute
Jonas 1 9000 8009 worker1
Jonas 2 9003 8010 worker2

The Apache web server receives the client requests and forwards them to one of the Jonas instances :

Read more…

Categories: Apache, Architecture, JOnAS Tags:

How to configure the module mod_jk with Apache and Jonas ?

October 6th, 2011 No comments

Apache is often the web server used in front of an application server (for instance Jonas).
You need a module like mod_jk to configure Apache with Jonas. Here are the details to configure that module (under RedHat Linux) :

1) Download and install the module mod_jk
mod_jk is an Apache module which can be used to forward a client HTTP request to an internal application server, using the Apache JServ Protocol (AJP).
To get it, type the following commands :

cd /usr/lib64/httpd/modules
wget http://archive.apache.org/dist/tomcat/tomcat-connectors/jk/binaries/linux/jk-1.2.31/x86_64/mod_jk-1.2.31-httpd-2.2.x.so
chmod 755 mod_jk.so
/etc/init.d/httpd restart

The module will show up in the modules folder of Apache : /etc/httpd/modules

2) Configure Apache and mod_jk
First, you need to load the mod_jk module into Apache when it starts.
In the main Apache configuration file, /etc/httpd/conf/httpd.conf, add the following line :

LoadModule jk_module modules/mod_jk.so

Then you need to specify the path to the workers properties file and configure the contexts and the workers which will handle these contexts :

<IfModule jk_module>

JkWorkersFile /etc/httpd/conf/workers.properties
JkShmFile /etc/httpd/logs/mod_jk.shm
JkLogFile /etc/httpd/logs/mod_jk.log
JkLogLevel debug
JkLogStampFormat "[%a %b %d %H:%M:%S %Y] "
JkRequestLogFormat "%w %m %V %T"

JKMountCopy All

# Send requests for context /blabla/* to worker named worker1
JkMount /blabla/* worker1
# Send requests for context /blabla* to worker named worker1
jkMount /blabla* worker1
# Send requests for context /blabla to worker named worker1
jkMount /blabla worker1
# Send requests for context /blabla/ to worker named worker1
jkMount /blabla/ worker1
# Send requests for context /anotherContext* to worker named worker1
jkMount /anotherContext* worker1

The line JKMountCopy All is very important. It copies the mount point definitions in all the virtual hosts.
Create and add the file workers.properties to /etc/httpd/conf/ :

# Worker list
worker.list=worker1
# Define worker1
worker.worker1.port=8009
worker.worker1.host=127.0.0.1
worker.worker1.type=ajp13
worker.worker1.lbfactor=1
worker.worker1.cachesize=10
# Load-balancer
worker.loadbalancer.type=lb
worker.loadbalancer.balanced_workers=worker1
worker.loadbalancer.sticky_session=1
worker.loadbalancer.local_worker_only=1

Here I have created only one worker (worker1) because I just want to forward requests to an instance of Jonas. There is no load-balancing in this configuration since there is only one single instance.
loadbalancer is not a real worker, it is responsible for the management of several “real” workers.

3) Configure Jonas
To enable AJP connections to the 8009 port of the Jonas server, you need to create an AJP connector in the $Jonas_Base/conf/tomcat6-server.xml and $Jonas_Base/conf/tomcat7-server.xml files :

  <!-- Define an AJP 1.3 Connector on port 9009 -->    
    <Connector port="8009" protocol="AJP/1.3" redirectPort="9043" />
  <!-- An Engine represents the entry point (within JOnAS/Tomcat) that processes
         every request.  The Engine implementation for Tomcat stand alone
         analyzes the HTTP headers included with the request, and passes them
         on to the appropriate Host (virtual host). -->

    <!-- You should set jvmRoute to support load-balancing via AJP ie :
    <Engine name="Standalone" defaultHost="localhost" jvmRoute="jvm1">
    -->
    <Engine name="JOnAS" defaultHost="localhost" jvmRoute="worker1">

Here is a schema that sums things up:

Links :
http://tomcat.apache.org/connectors-doc/ajp/ajpv13a.html
http://jonas.ow2.org/current/doc/doc-en/integrated/configuration_guide.html#N11C7D
http://tomcat.apache.org/connectors-doc/generic_howto/loadbalancers.html

Categories: Apache, Architecture, JOnAS Tags:

Start JoNaS server from Jenkins with a shell script

September 19th, 2011 No comments

Continuous integration is a process that involves the build of the project but also the deployment of the artefacts (the term used with Maven). These artefacts are archives such as EAR, WAR, JAR files.
I had to write a shell script in Jenkins that would run just after the build and that would stop the JoNaS server, deploy the artefacts and restart JoNaS.

The project is based on Maven. However to create a job that executes a shell script, the first option “Build a free-style software project” seems best, instead of the “Build a maven2/3 project” option.
The process is quite simple :
1) stop JoNaS
2) delete the previous EAR file
3) copy the EAR file that was just built to the JoNaS deploy folder
4) restart JoNaS

I chose to poll the SCM every 10mn. So that means JoNaS checks every 10mn if a commit occured during the last 10mn. If so, it builds the project again. And deploys it.

Notice the highlighted line export BUILD_ID=dontKillMe. This is very important.
I spent about 2 hours wondering why JoNaS would start and then would stop after 20 or 30 seconds.
The reason is that Jenkins attempts to clean up after itself, so all processes that have that build ID are killed by default. So that processes do not accidentally leak and run the machine out of memory, for one.

The issue is described in this page with a funny title :
https://issues.jenkins-ci.org/browse/JENKINS-2729
Other interesting link :
http://wiki.hudson-ci.org/display/HUDSON/ProcessTreeKiller

Categories: Continuous integration, Jenkins, JOnAS Tags: